


Homemade Gin – Day 1
Apr 04
Broke out my Homemade Gin kit I got for Christmas.
Never had Gin and am looking forward to trying it.
This cool kit makes it crazy easy.

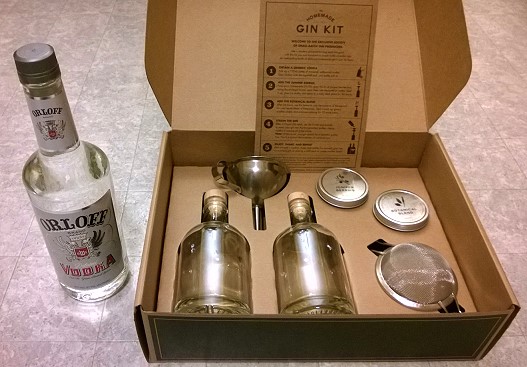
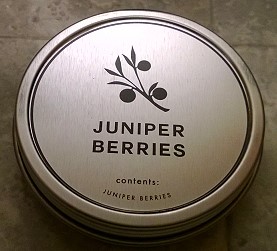
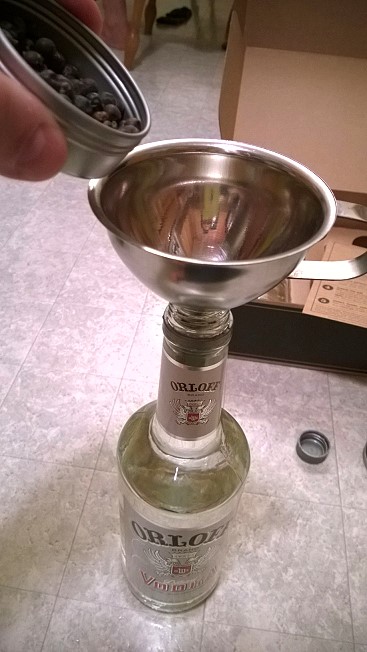
Added the Juniper Berries to the 750 ml bottle of Vodka tonight.
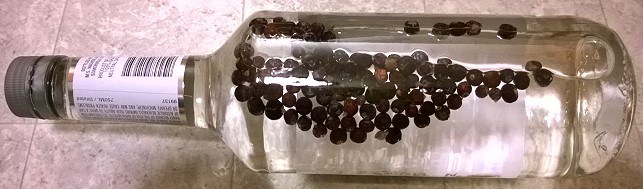
This will sit for 24 hours, then I’ll add the Botanical Blend to it.
Stay tuned!
—– Brandon
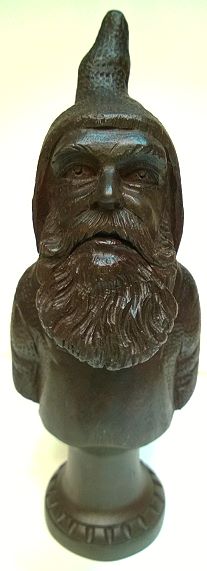
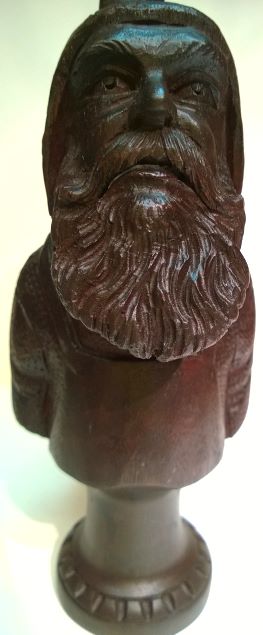
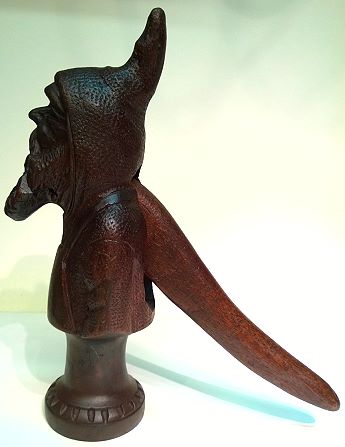
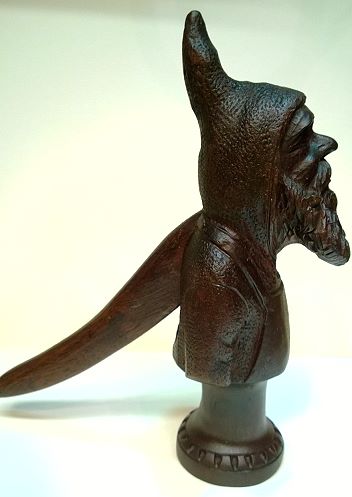
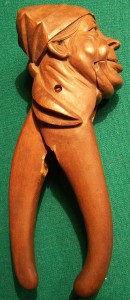
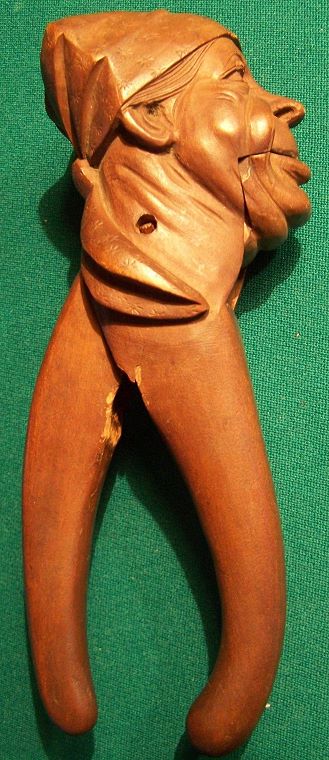
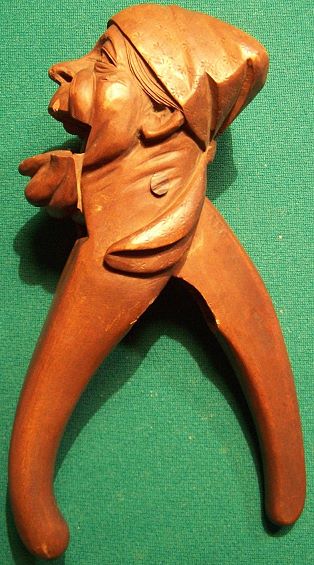
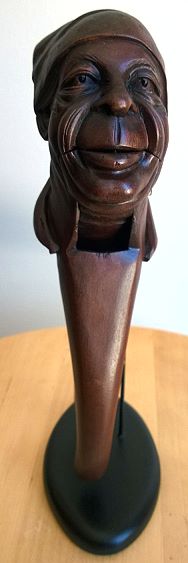
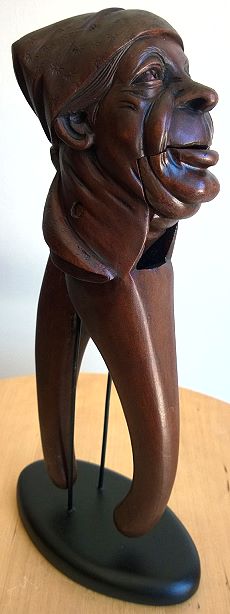
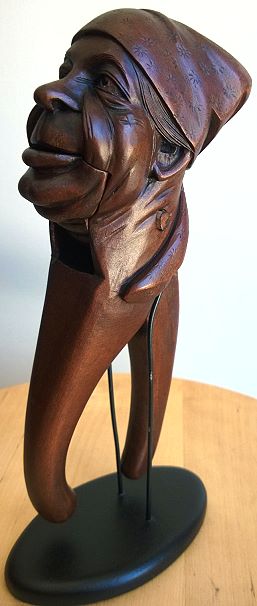
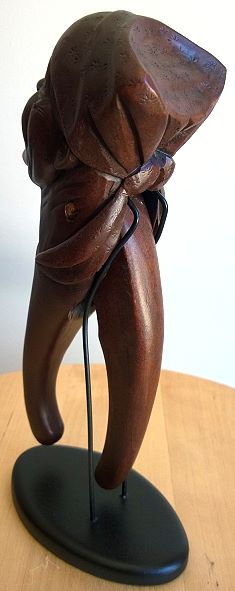
A rare piece…
Mar 14
Here is a rare Swiss piece I was lucky to find on Ebay back in December of 2013.
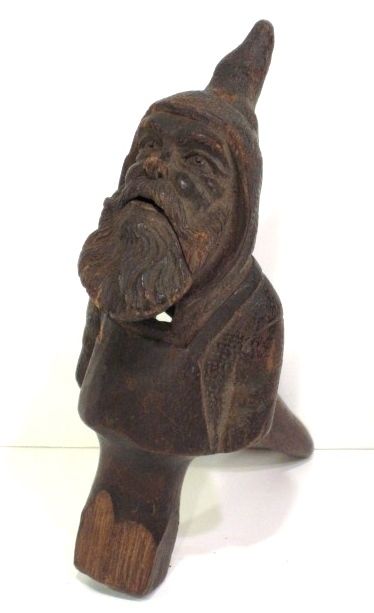
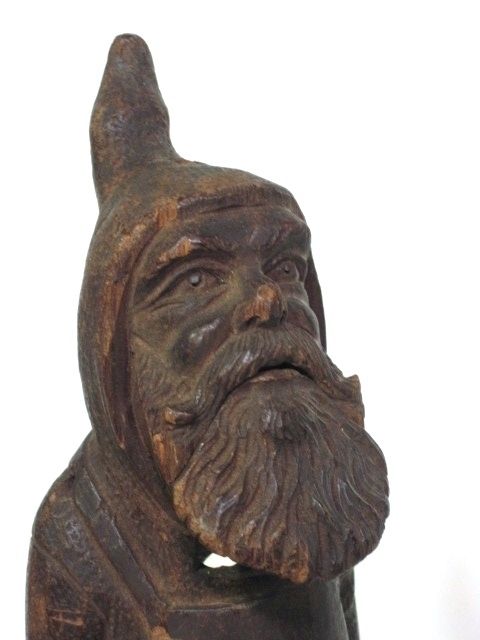
As you can see it had some extensive damage. Most of the base was missing and it had a hole drilled in the top of the head. It also had some damage on the face, especially the nose.
I wanted to have the piece fully restored for my wife’s birthday at the end of February. Unfortunately the weather here in Ohio did not cooperate and I had to give it to her partially finished.
The weather has finally broke a little and I was able to get it done this week. Missy is very happy with it and it is going in our private collection.
Be sure to click on the pictures for a bigger view:
Thanks for looking,
—– Brandon
An Addendum
Feb 21

It’s official, the Addendum to The Art & Character of Nutcrackers is available for purchase from the Leavenworth Nutcracker Museum:
Click here to buy the Addendum to The Art & Character of Nutcrackers
Be sure to look for my original pieces featured on pages 106 and 110.
There’s also mention of me on page 5 for the repair work I did on a 16th century French piece for the museum a few years ago. Unfortunately, the publisher misspelled my name as “Benard Etto”. So here’s a link to the repair work that proves it’s me:
Also if you don’t yet already have Arlene’s first book (The Art & Character of Nutcrackers) it’s available in the store as well.
I actually own 2 copies of each of these books. One is kept pristine while the other is used as reference. That way I don’t get all worried about having to take it out to the shop if I need to.
Arlene Wagner’s first book was a key element in getting me started in creating and repairing nutcrackers. Having my work featured in her new book is a huge honor for me. So if you get the chance, be sure to pick up a copy (or two). It’s a great book and a must have for any collector.
—- Brandon
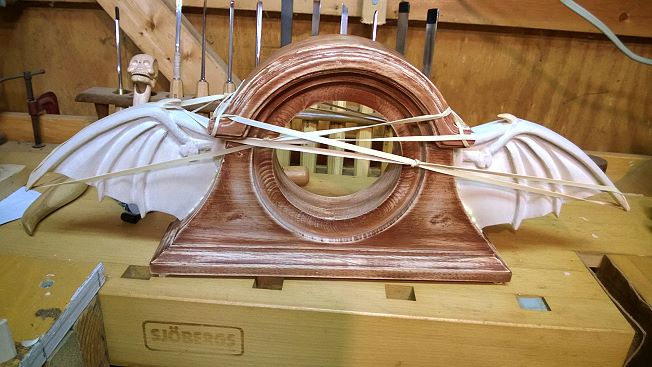
Wings, wings, and more wings
Feb 01It’s been a really cold and snowy weekend over here in Ohio.
It’s perfect weather to hunker down, fire up the heaters in the shop, and carve carve carve!
My wife and I team up to make what we call “Batwing Clocks”. I carve and attach bat wings to a traditional mantle clock, then my wife paints them in Halloween and Disney Haunted Mansion themes.
Here are a couple pictures of what goes into making these:

Bat wing drawn on Basswood and ready to be carved.
My creative clamping technique. Lots of rubber bands.
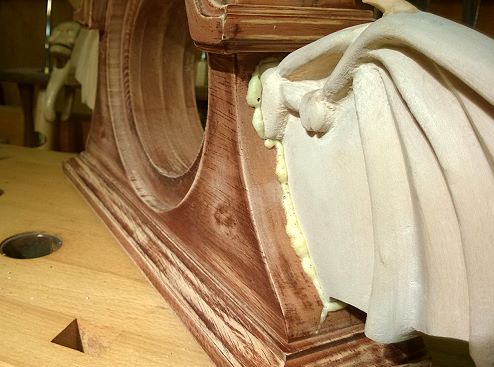
The wings are doweled and glued permanently in place. Gorilla glue foams as it dries.
My busy carving bench with more wings in process and other projects lying around.
Here are links to some of the clocks Missy has sold previously and one available now for purchase:
Haunted Mansion Themed Batwing Clock
Halloween Themed Batwing Clock
Halloween Moon and Owl Batwing Clock (avalable)
As always, thanks for looking!
—– Brandon
Argh! There be Pirates…
Jan 17Here’s a great example of a figural Pirate nutcracker.
Picked him up on Ebay. He had some condition issues (chipped lip, chipped handle, and various dings in the face). Looks like he was dropped or the family dog got to it and carried it around in its mouth a little.
I originally bought this one to fix up and sell, but the wife fell in love with it after it was done so looks like he’s going in our collection. Oh darn! 🙂
I really do like how this one came out. The darker stain really makes this a better piece.
See the before and after photos below:
 Before

Before Repairs – Close up of the face
Before Repairs – Right side showing handle damage
Before Repairs – Left Side
After
Stay tuned, more great pieces to come!
—– Brandon
It’s all about the base… bout the base…
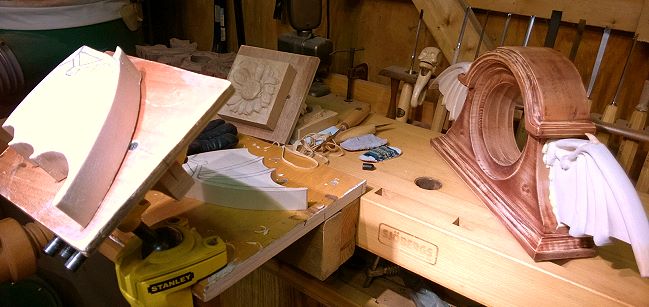
Dec 14All my Nutcracker bases are hand made and hand fitted to each piece. Bases are very important. They not only allow you to display your nutcracker proudly, but safely as well.
The ebay elves have been really really good to me lately so I have a few new pieces being added to the collection and coming up for sale soon that need bases made. I can’t show the new pieces yet because all are in process of being restored, but I can show the work that goes into creating the custom bases I make.
The wooden base part is first cut out on the band saw. I now have templates made from thinner wood so I don’t have to steal a base from our nutcracker collection (like you see in the picture) every time I need to trace and cut a new one. The bases below are already cut out and ready to be ground to shape. I use an angle grinder with a 60 grit flapwheel to make short work of hand shaping each base so they are contoured and look worn.
*Note – The nutcracker bases pictured are being made from Black Walnut because that’s what I had on hand. Any 1/2 inch thick wood will work.

Here’s a picture of the bases after they’ve been ground to shape and sanded smooth.

Every nutcracker presents its own challenges regarding how the wire needs to be shaped and where it’s going to support the nutcracker. Some can wrap around while others have to be made to fit up under the chin by slipping in from the back. The one I’m making here will slip in the back and support the piece under the chin.

Here’s a picture of the nutcracker stand assembled and waiting for final sanding. Holes are drilled and the shaped wire is simply epoxied into the base. When I fit everything, I make sure the nutcracker will rest about 1/4 inch above the base. That keeps the center of gravity low and reduces the risk of the piece being easily knocked over. The globs of epoxy around the wire are sanded flat once it’s cured and hard enough to sand.

Here’s the final shot of the stand all painted and drying on the bench. I simply use flat black spray paint. I usually shoot it once, sand it with 400 grit, and shoot it again. That smooths out some of the grain and makes for a durable finish.

So there you have it. That’s how I make the custom bases for the nutcrackers in my collection and for the ones I sell.
—– Brandon